Translate

Friday, June 27, 2014

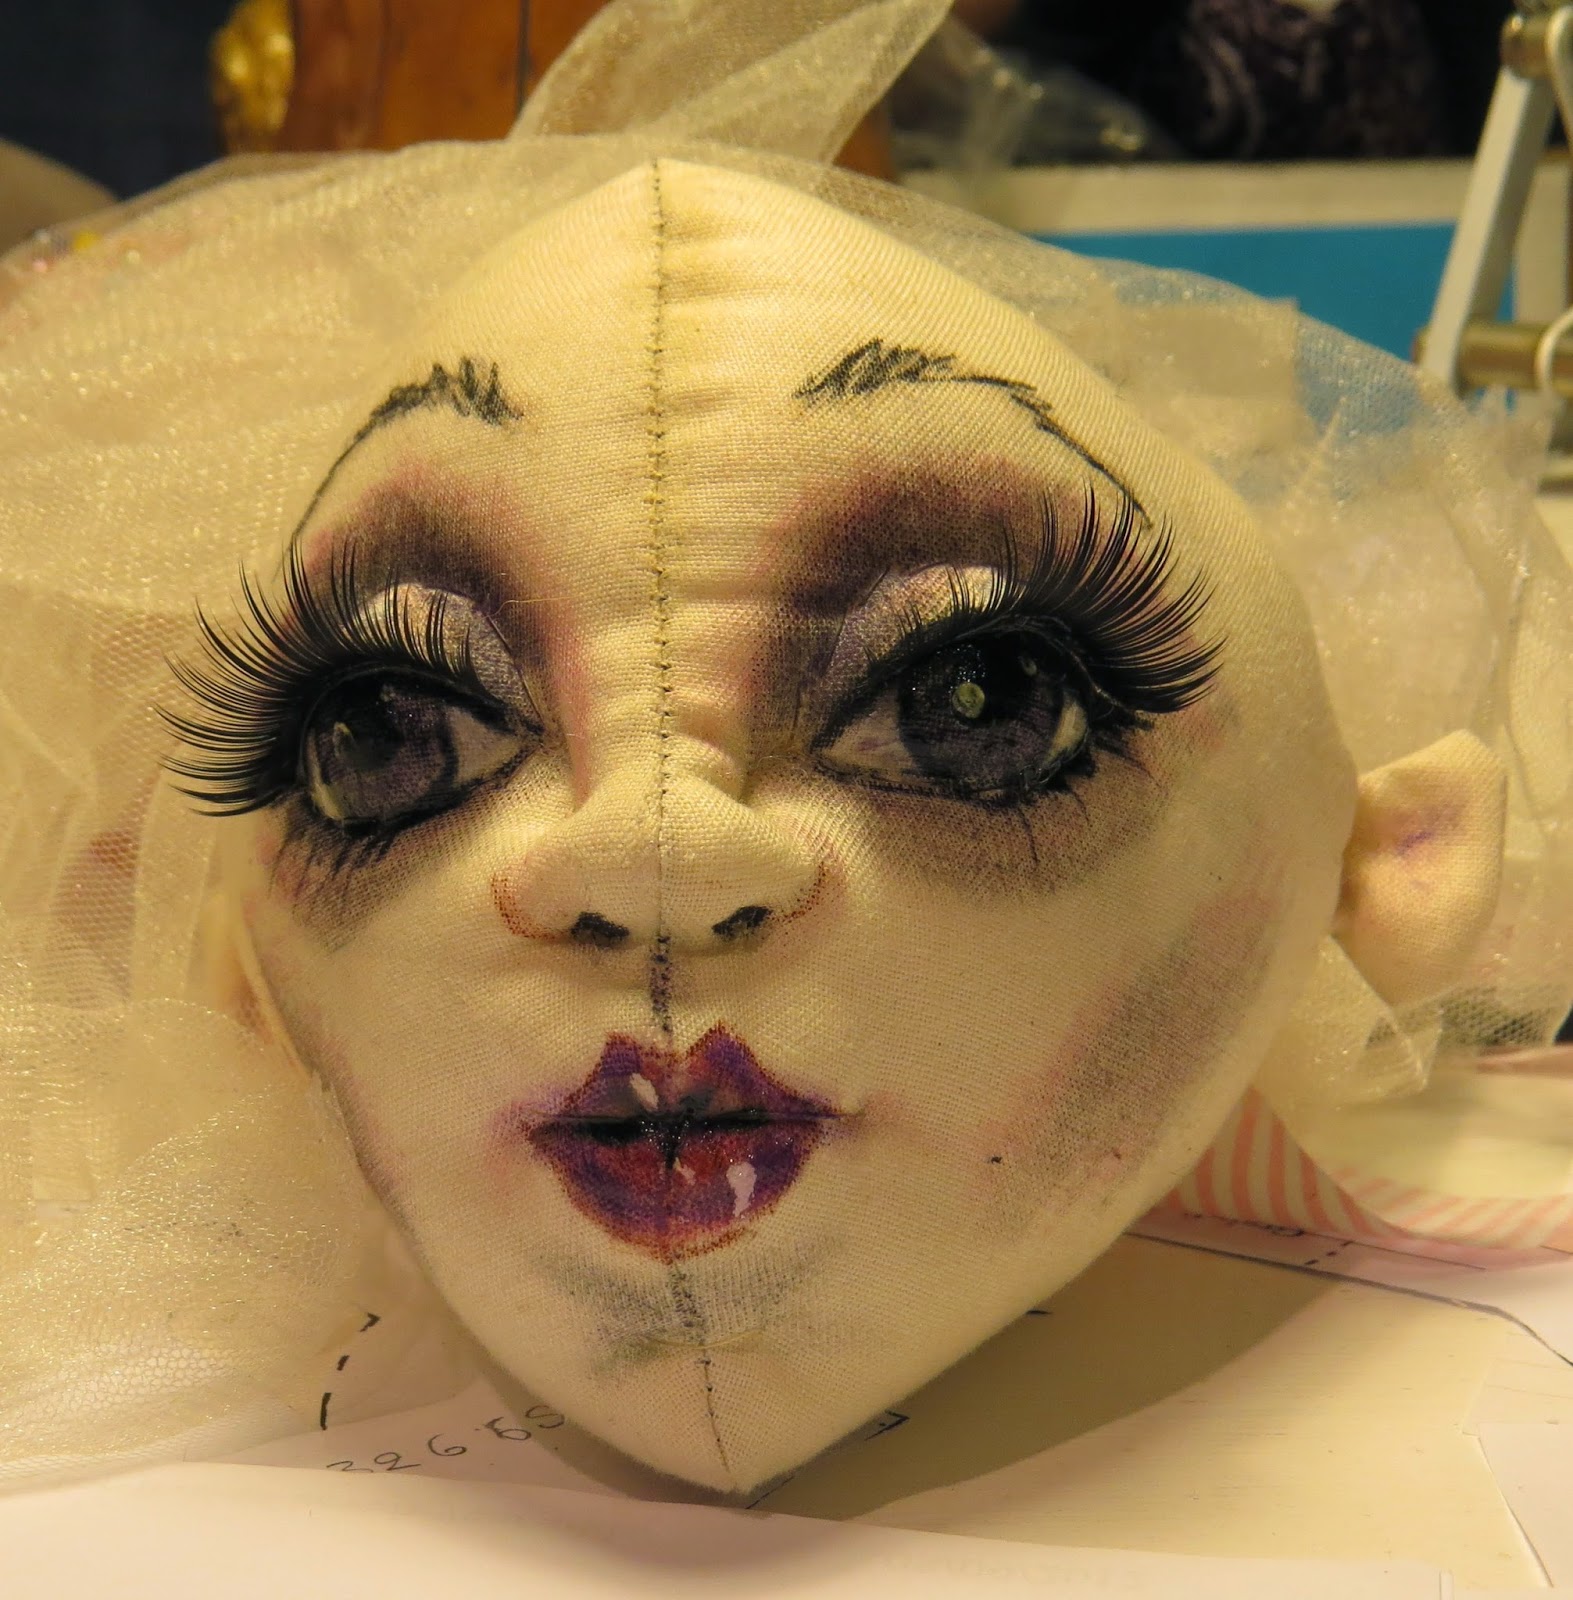
Tutorial: Part 2 - Needle-sculpting a face.

Here is part two of how to needle-sculpt a face.

There are no hard and fast rules about needle-sculpting a face. Here, I am doing one side at a time. 

As you saw previously, I marked out the face with a bit of colour, so I could see how I want it to go and how even I could make the features.  I don't do it this way every time, but I have been doing it this way lately with some success.
Thread your long darning needle with a good length ( approx half a metre - 30 inches) of strong thread.   
 Make a holding stitch at the back of the head, enter and exit at the corner of the eye.
 Take a small stitch beside it, re-enter and scoop stuffing up with the needle to make a bridge for the nose and exit at the corner of the other eye.
 Follow the line of colour down the nose length, making three stitches on each side.  Remember to scoop up stuffing each time you go back and forwards.
 Reinsert the needle, scoop stuffing up with the needle and exit at the opposite nostril. 
 Take a smal stitch beside it and re-enter the needle, exiting back in the original place.  You can do this twice to encourage the nostirl indent upwards.  make the last exit in the same nostril hole. 
Re-enter the needle, scoop up the stuffing to make the nostril flare, and exit at the end of the row of three stitches above the nostril hole.
 Take a stitch to the side, following the curve of the nostril flare as above.  Insert the needle and exit in the opposite nostril.  You can do this twice to create the indent, as with the other nostril.  Exit in the nostril.
  Take a small stitch, scoop up the stuffing and exit at the end of the row of three stitches above the nostril.
 Take a stitch to the side, following the curve of the nostril flare as above. Reinsert the needle and exit in the cheek dot.
 Take a stitchsideways and with the needle, really scoop down into the stuffing, to make a good cheekbone.  Exit at the outer corner of the eye.
 Take a small stitch, re-enter the needle and exit at the cheek dot again.
Gently squeeze and pull on the thread to pull the corner of the eye down and the cheek up!
 Now for the other side of the face!

Take the needle across the mouth and enter at the cheek dot.  Really scoop down into the stuffing, to make a good cheekbone and exit at the outer corner of the eye.
 You can see the tension in my finger there, as I am slowly pulling the thread to indent the mouth and cheek at the same time!  you can use your thumb to squeeze the mouth shape and keep it there while you keep the tension on the thread. Take a small stitch, re-enter the needle and exit at the cheek dot again, same as the other cheek.  
  Take a stitch sideways, to assist the cloth to hold the stuffing up , enter the cheek and exit at the nostril flare.
 Enter at the top of the nostril flare and exit under the lip.  This makes the indent between the lip and the chin.  Take the stitch across to the other side. (Notice how the stitches under the nose and chin stretch the cotton fabric?  I could have eliminated that by making my stitch length smaller - but I didn't.............sigh!  Never mind.  no one will notice it when it's all finished - unless it goes into a competition and my needlework  is JUDGED!
 Enter the needle and exit up at the back of the head.
 Gently tug the thread to create a soft indent and not too much so it creases.  Make a holding stitch or two and cut the thread.
And there you have it! 
I hope this tutorial takes a lot of the mystery of needle sculpting away for you and I hope you will practice it and gain confidence with needlesculpting.

  I would love to see any pictures anyone wants to share with me.

Next week, I will follow this up by showing how I colour the face.  

Sunday, June 22, 2014

Tutorial: Part 1 - Preparing a cloth face for Needle-sculpting.

I have decided to share how I sometimes needlesculpt a face.  This is pretty much the process I go through most times, though I always seem to vary it depending on the expression I am wanting to convey!

This is a nice head pattern I designed and it works very well.  I like the shape of it!  Some things to note when working with cotton fabric.  You will see places that pull on the threads.  Be careful not to overstuff these tight areas or it may fray.  Something else to note - that now annoys me!  Because the nose refused to fill with fibre, I popped a tiny pompom at the tip, but you can see it has moved slightly to the left of the nose, leaving the tip empty!  If I was any sort of needle-sculptor, I would use my needle to move it back into postion.   The idea with pompoms is to hold them in place with a pin till you have finished stuffing the face.  I didn't  - too much of a hurry!  Still, it's an opportunity to show what should be done!

The best thing to do with cotton fabric with not much stretch, is to draw it out on the BIAS! That way you have more success with stuffing in the round and getting into that nose!


Before beginning to mark out the face the most important step is to spray the face with a fixative, or hairspray, to ensure that no colours will run into the fabric and ruin the face!

When planning a face, I like to use my fingers to see where the eyes should be placed that would give the best effect for what I want to do.  This is usually on the bridge of the nose.
 I mark out in pencil, roughly where I will put the eyes, checking if they are evenly spaced and the right size. I often use one of my fingers to get the correct width of the eye.

 Notice the distance of the corner of the innereye from the mid seam?  I use the midseam as a gauge of where to put the marking for the inner corner of the eye - approx 1/4 inch, or .5 cm. Not too close - not too far!  The distance between the eyes is about the size of another eye.
 Now I mark it out roughly in Crimson Red Prismacolour pencil, to begin to develop contour and shading.
Down the side of the nose and around where the nostril flares should be.
 Next I mark out the midline of the lips and add the marks for the cheeks and chin cleft, which creates the shadow under the bottom lip.
 I go over the eye shading it with black prismacolour pencil, to add depth.  You could leave this till later if you wish, because as I found out - it smudges!

A dab of acrylic white paint on the eye - I just do the bit that won't have eyeball in it, because white paint under the prismacolour pencil with  make it milky.

So there you have it.  The face basically prepared for needlesculpting.

Saturday, June 21, 2014

Riversdale Arts Exhibition Dolls

These are the dolls I have chosen to send to the Riversdale Arts Exhibition, coming up in July!

I loved making this one.  It was the paper hat that got me, but I just happened to have made a wee head accidentally when I was making the Anzac Dolls!  Then I saw an idea that someone had done in Art Doll Quarterly, in clay and knew this would fit!  

I call this "Bird Watcher!"

This besom lass is what I have called "Moulin Rouge"!

 She has that Tarty, coquettish look of confidence and resiliance that I admire!  And she stands alone!  Since this pic, I have added Earrings.
This is my "Old Friends Keep You Sane"! It is a pattern I designed and for sale on Etsy and Fabric Addictions. I made a stand for them and she is resting her hand on his shoulder.  Her stick is glued in place too.

I am in the process of designing another pattern just now too, so watch this space!

Wednesday, April 23, 2014

ANZAC DAY 25th April 2014

 My ANZAC tribute to all people who have been captured, fallen, wounded or sick, alone, despairing, 
 that they will find the offer of comfort, of human touch, aid, 
 a care parcel from someone in the world who cares and a letter from home!
 Lest we forget.

The nurse was able to offer a care parcel delivered from Geneva and packed by someone in the world who leant their support by way of showing their care in putting together a parcel with specific items as outlined by the authorities.  This had to be checked and a special label stuck on it, to be deemed fit to send to captives and prisoners of war.  Above is the ANZAC Symbol, a poppy, with the Red Cross Colours in a circle, made from thin old woollen blankets.  It is flanked by the Australian and New Zealand flags.

Sunday, April 6, 2014

City Girls

I needed a change, so I have been making up Jill Maas's pattern of City Girls!  

You can't just make one!  There has to be two, so they can conspire together and gossip!  Not to mention go shopping and having coffee at all the latest café's!

Oops!  They have discovered a Tilda Angel on her break!

Had great fun making these!

Saturday, March 29, 2014

A different doll

 This is a departure from what I normally make, but I wanted to try out a different style and stretch myself.  I am not delighted with it, but I have learned quite a bit making it.
 By raising the eyes, normal eyelashes attach very well.  Of course she had to be somewhat sombre of expression to go with her dramatic looks.
 I decided to make her ball jointed for posing
 But found her head was too big to pose well, even with a rod inserted to keep it help up.  there are many things \i could have done, but stayed with this way of doing it.
 Here she is with other dolls of average size, that |I normally make.  You can see her waist is tucked in as I thought of making her a Marionette, but her new owner didn;t want that in the end.
 Here she is trying on clothing styles and hair.
 She hangs nicely
 Arms can be posed
 Here she has a wig of wool, looped to make it look fuller.
I have called her Asphyxia after the character in a puppet play.

Monday, March 17, 2014

Pin Happy Pig!

This delightful Pinchshion was made from my pattern by Becke, who said she made three before she was happy with it!  Becke says she is not an accomplished sewer, so I was thrilled with her perseverance at making this project!  Well done Becke!

Thursday, March 13, 2014

Saucy Sal!

Saucy Sal is my latest Saloon Gal doll.  I was trying out some different techniques to see if I could get a pose that would work, i.e. legs that would stand, a body shape and arms.

 Using silk worked really well as her dress.  Pleasing gathers to scale. 
 I liked the way her legs fit on her hips while giving the impression one hip is raised.  The dress hitched up helps this illusion too!
 The beading was some a friend made for me to use on dolls, but it only goes as far as you can see, so looks more like a collar to frame her ...um...assets!
 All clothing is stitched on.  I liked the roundness of her rump, so didn't want to hide it.
 All the proportions on this doll are exaggerated, i.e. the head is too big for the body, the legs are too small, the waist too narrow, but it adds to the characterisation of the doll.
On the good side - she stands unaided on her booted feet!

Her arms have no hands to give the illusion of fists on hips.

  What do you think?

Free Patterns

Selkie

  I have a friend who makes jewellery from Seaweed and is very interested in reseeding the kelp beds. She is interested in all thing's ...